Deploying a Kubernetes cluster and managing/setting up a sample app using the UI
Make sure you have created an account with us by signing up here
Deploying a Kubernetes cluster using the Infrastructure Editor
To deploy a Kubernetes cluster, you will need to go to your Infrastructure Editor and follow these steps.
Add Kubernetes cluster
Click on
Appson the left hand side and click onKubernetes. This will create a basic Kubernetes cluster with a master instance pre-selected but no worker nodes.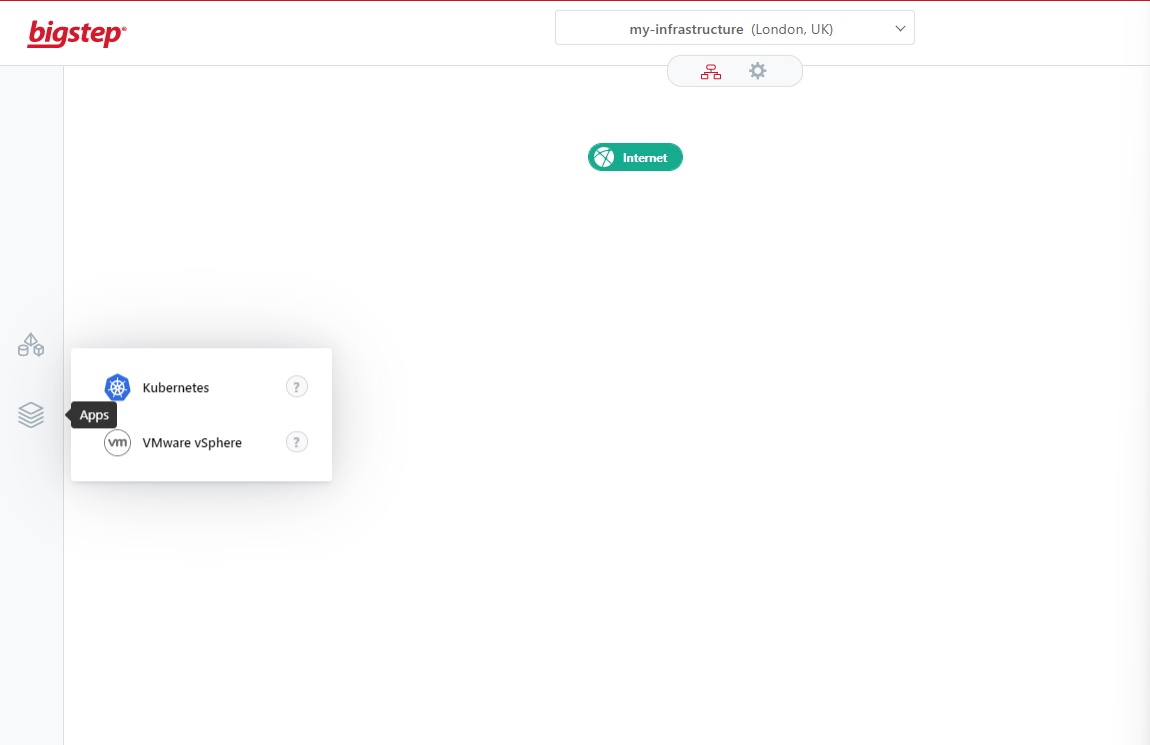
Add Worker Nodes
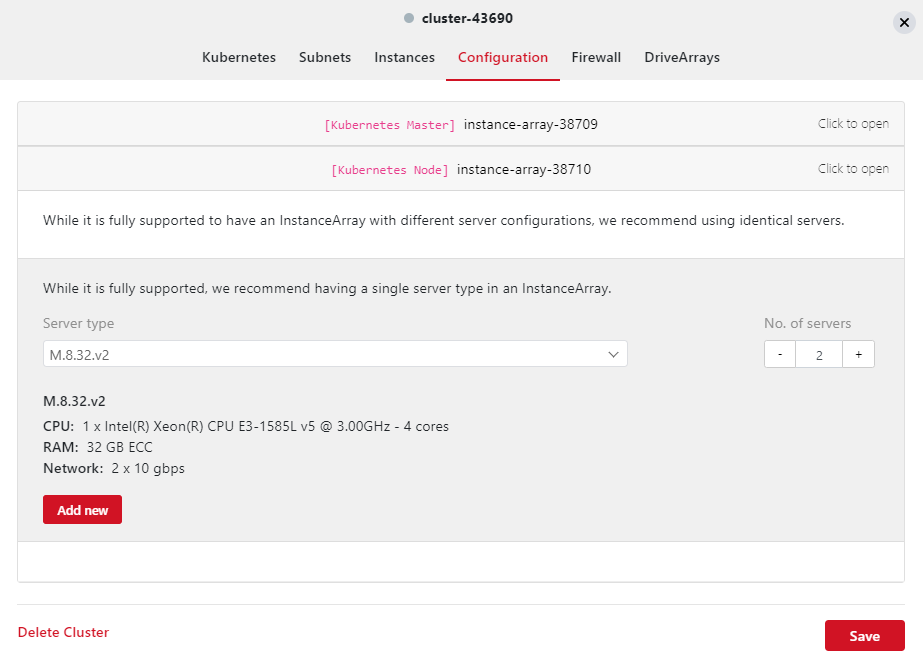
To add worker nodes and change the configuration of the master node, click on one of the
Instance Arrayscreated, click onConfiguration, then click onKubernetes Nodeand click onAdd newand select the instances you wish to use as nodes. You can also click onKubernetes Masterto change the master node. If you add more worker nodes in the future, they will be added into the cluster automatically once you have hit deploy: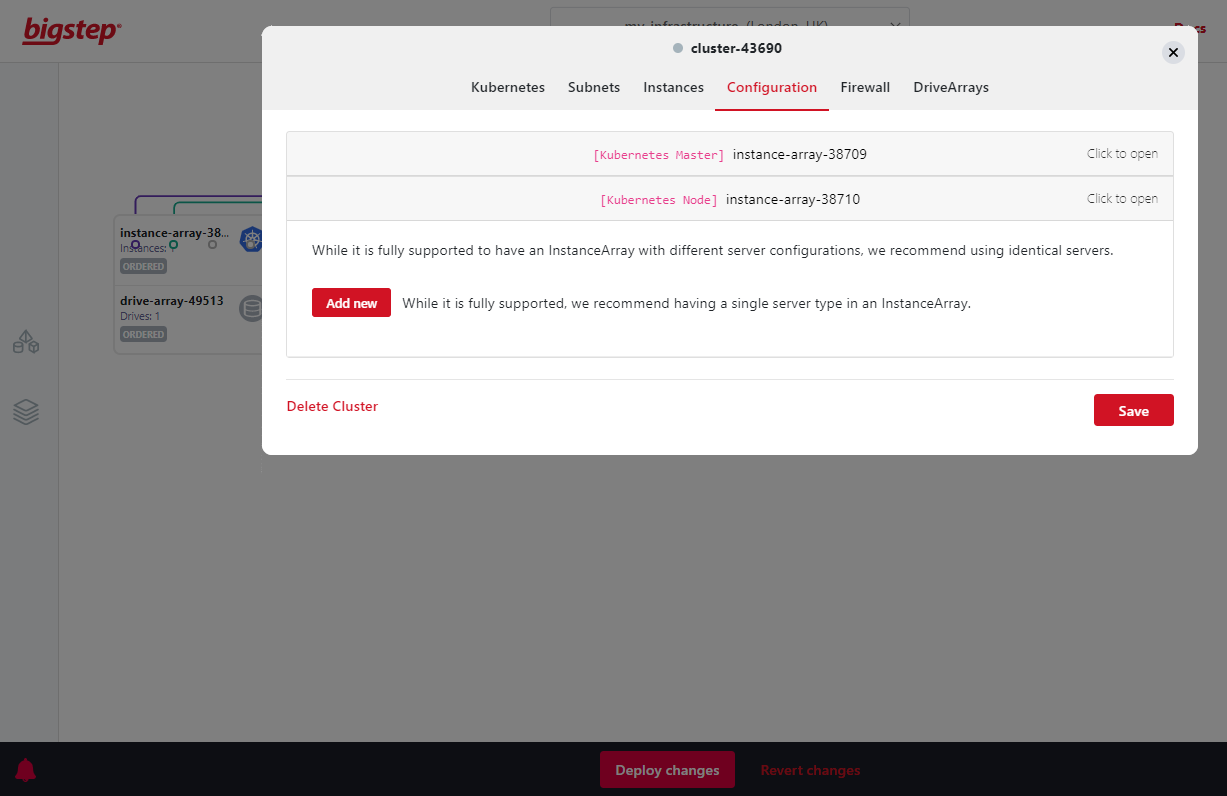
Here we are adding 2x 8.32v2 worker nodes. You will need minimum of 2x worker nodes:
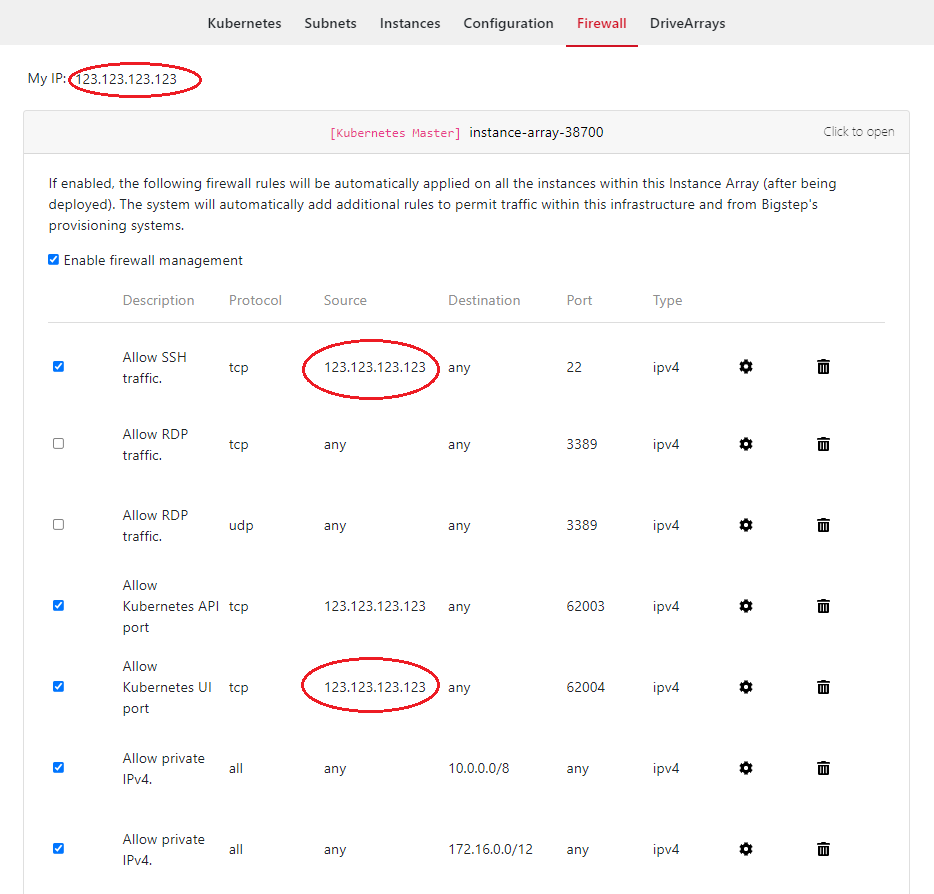
Change Firewall Rules
Alter the firewall rules to allow yourself access to the instances and cluster. You can click on
Kubernetes MasterorKubernetes Nodeto change the specific access to each group. For this tutorial, you will need to enable SSH (22) and Kubernetes UI port (62004) access from your IP address (Source) on theKubernetes Masterfirewall page . Your IP address is shown at the top of the screen:
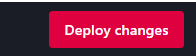
Deploy the infrastructure
Operations in the MetalCloud are not immediatelly deployed. In fact they can be reverted until the infrastructure is “Deployed”. Click on the big “Deploy” button from the bottom of the screen.
You now have a Kubernetes cluster up and running.
Monitoring and connecting via SSH to the cluster using the UI
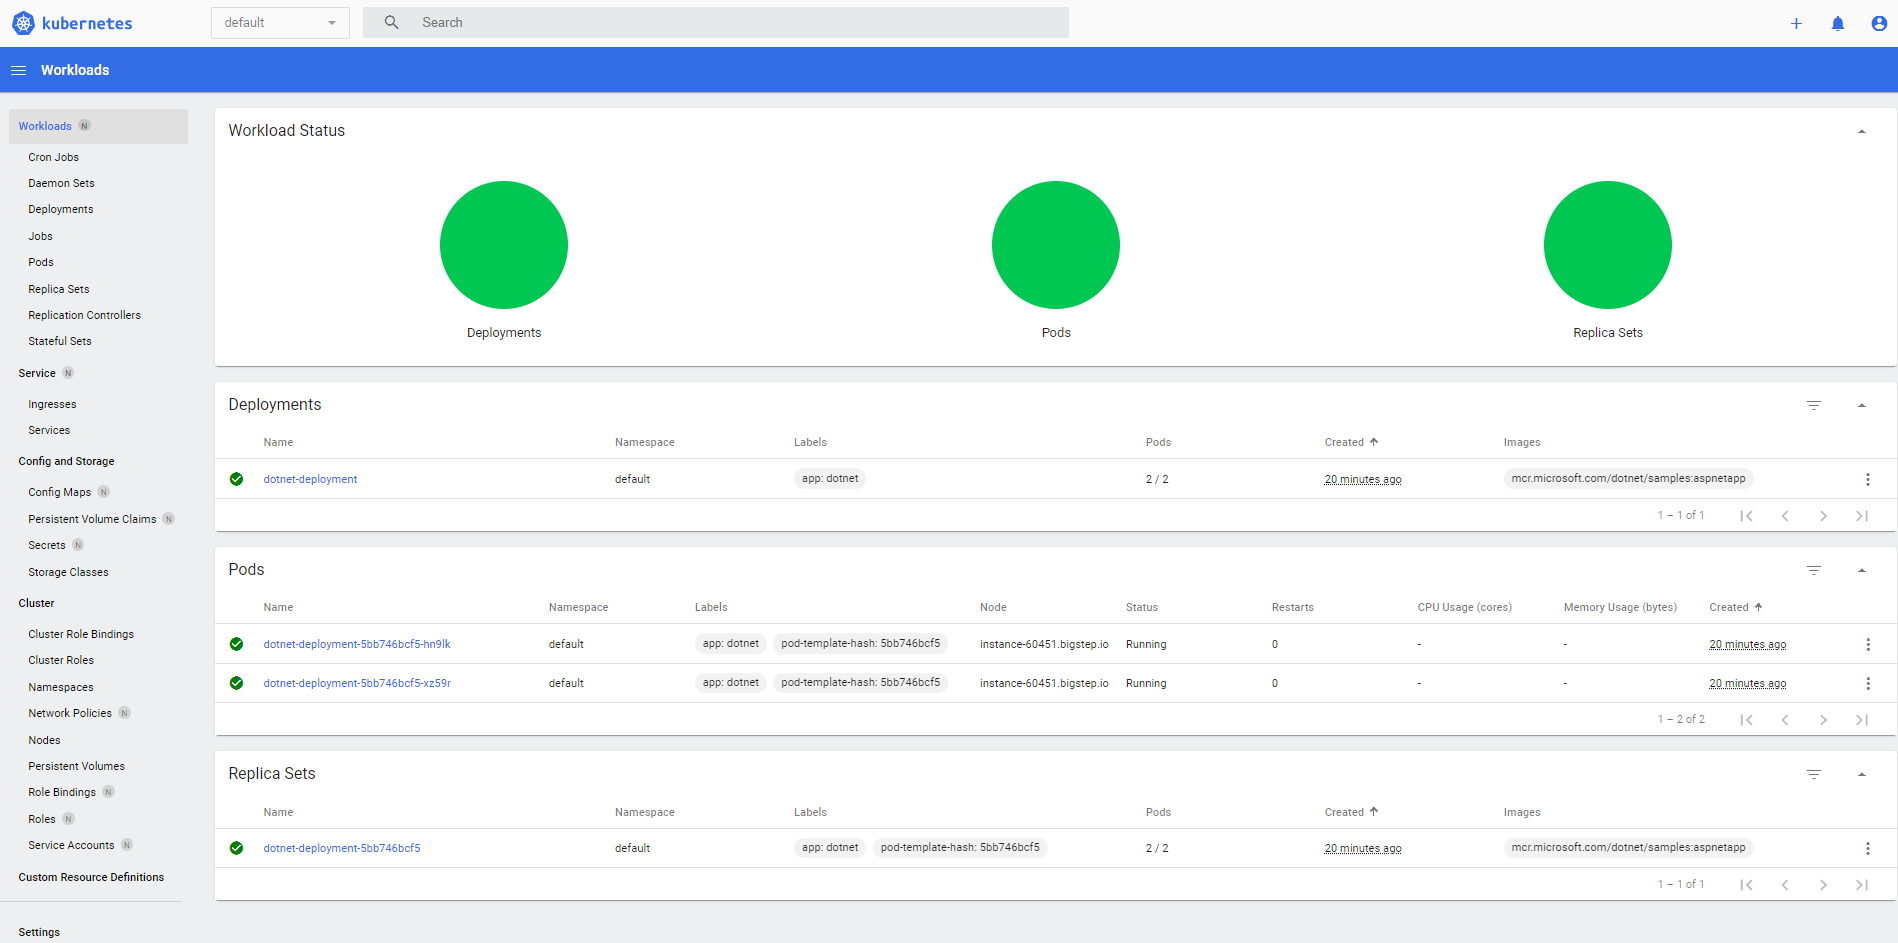
Monitoring the Kubernetes Cluster
Once the infrastructure has deployed, you can monitor the Kubernetes cluster by clicking on one of the infrasrtructures and clicking on the URL next to
DashboardThis will bring up the dashoboard. You can log in by clickingRetrieve TokenunderTokenand then click onCopy: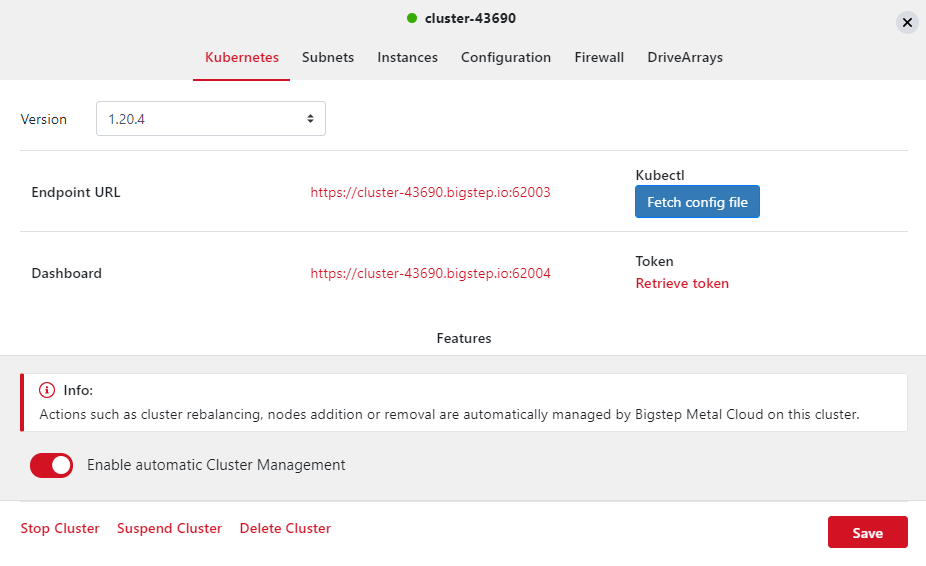
You can now paste the token into the web page that is opened and click on
Sign In: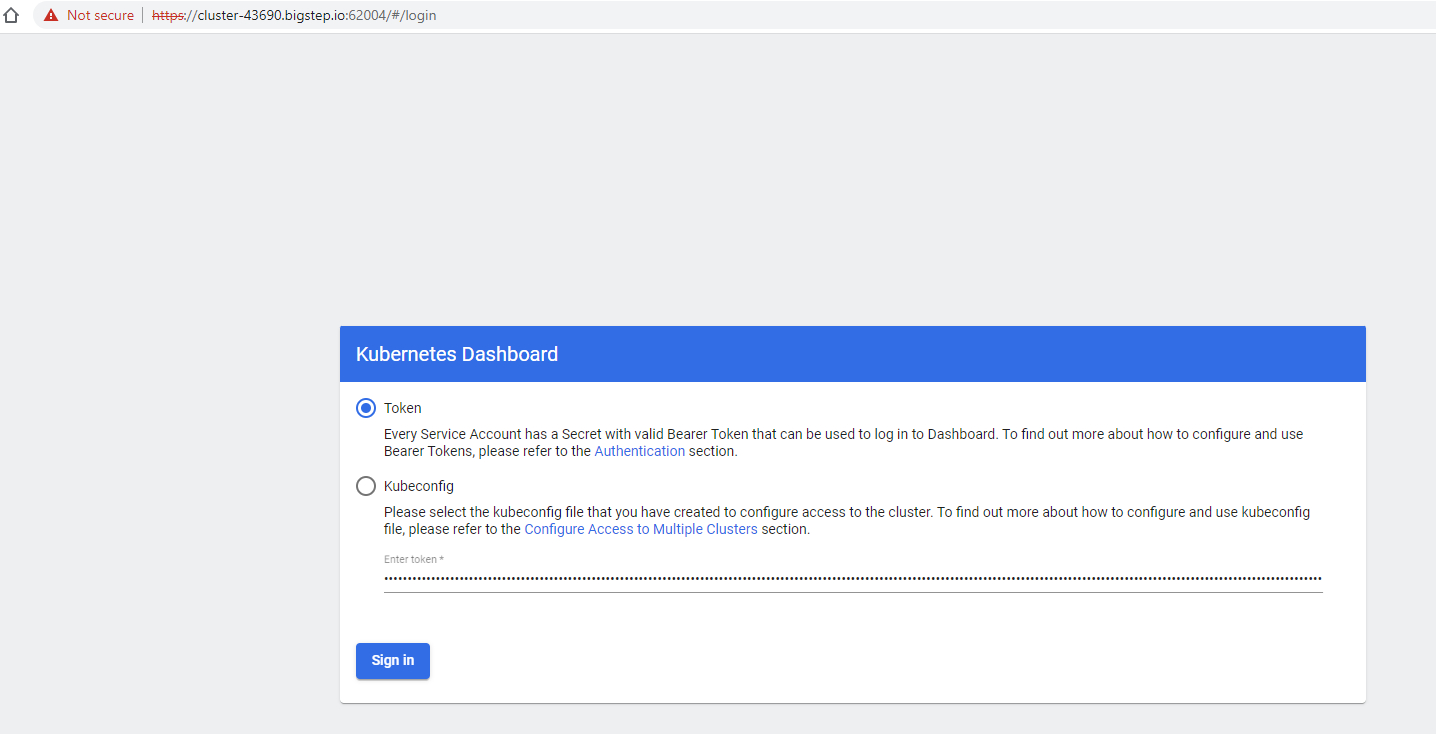
Now you will be able to see and monitor your Kubernetes cluster:
Connect via SSH to the Master node
To connect via SSH to the Master node, click on one of the instance arrays and click on
InstancesandKubernetes Master. Here you can click on theAccess Linkand it will launch your installed ssh client.You can retrieve the password by clicking on eitherRevealorCopyunderInitial PasswordIf you have Authenticator configured, you can click onBrowser SSH ClientunderHTML Console: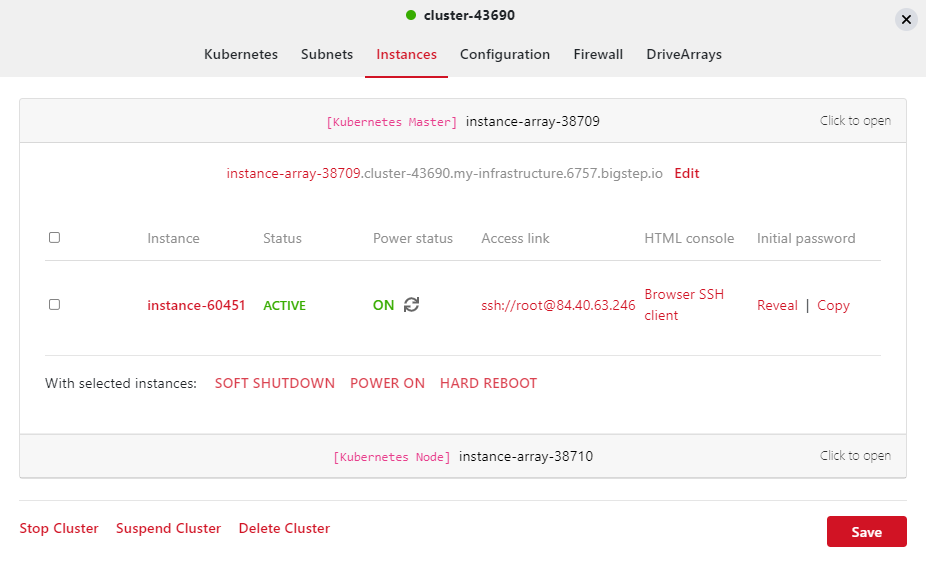
Setting up a sample application on Kubernetes
Setting up the initial application
In this example, the application and service are in a single file. This is based on ASP.NET samples container To set up your initial application, connect to the Master node by SSH as described in the previous section and accept the security warning. Create a directory structure to keep your configuration files in. For this example, we will use /app/ for the application
Create the file to store the configuration in:
vim kubernetes-sample.yaml
And copy the following into the file and save it
---
kind: Service
apiVersion: v1
metadata:
  name: dotnet-service
spec:
  selector:
    app: dotnet
  ports:
  - protocol: TCP
    port: 80
    targetPort: 80
---
apiVersion: apps/v1
kind: Deployment
metadata:
  name: dotnet-deployment
  labels:
    app: dotnet
spec:
  replicas: 2
  selector:
    matchLabels:
      app: dotnet
  template:
    metadata:
      labels:
        app: dotnet
    spec:
      containers:
      - name: dotnet
        image: mcr.microsoft.com/dotnet/samples:aspnetapp
        ports:
        - containerPort: 80
Lastly, you need to use kubectl to create the app and service:
kubectl create -f kubernetes-sample.yaml
You should receive the following output:
[root@instance-60451 apps]# kubectl create -f kubernetes-sample.yaml
service/dotnet-service created
deployment.apps/dotnet-deployment created
Setting up the ingress controller
Next we need to expose the application to the internet using an Ingress controller.
Create the file to store the configuration in:
vim kubernetes-sample-ingress.yaml
And copy the following into the file and save it:
---
apiVersion: networking.k8s.io/v1
kind: Ingress
metadata:
  name: asp-ingress
  annotations:
    nginx.ingress.kubernetes.io/rewrite-target: /
spec:
  rules:
  - http:
      paths:
        - path: /
          pathType: Prefix
          backend:
            service:
                name: dotnet-service
                port:
                 number: 80
Lastly, you need to use kubectl to create the app and service:
kubectl create -f kubernetes-sample-ingress.yaml
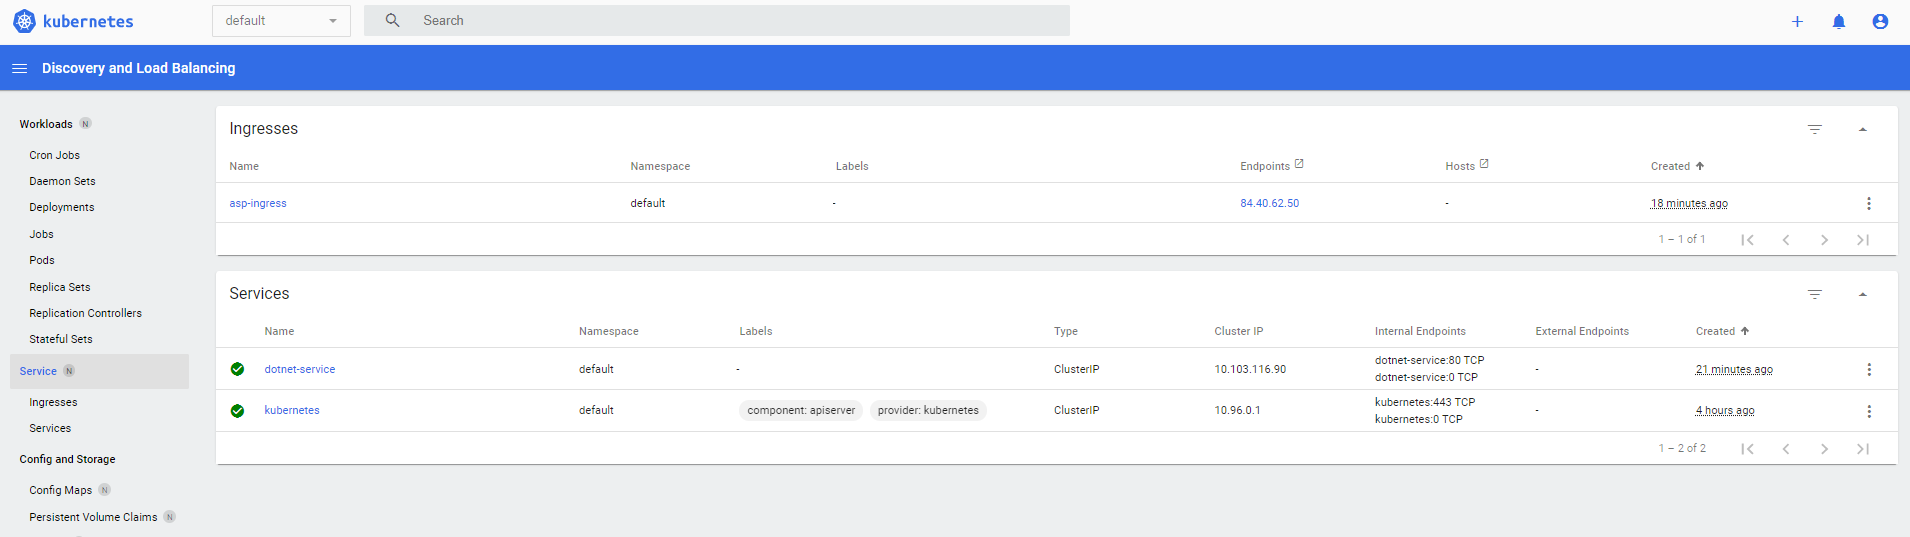
Verifying the application and controller are set up.
If you run:
kubectl get services --all-namespaces
You should get an output similar to this:
NAMESPACE              NAME                                 TYPE           CLUSTER-IP       EXTERNAL-IP   PORT(S)                      AGE
default                dotnet-service                       ClusterIP      10.103.116.90    <none>        80/TCP                       4m20s
default                kubernetes                           ClusterIP      10.96.0.1        <none>        443/TCP                      3h52m
ingress-nginx          ingress-nginx-controller             LoadBalancer   10.109.186.4     84.40.62.50   80:30972/TCP,443:31184/TCP   3h50m
ingress-nginx          ingress-nginx-controller-admission   ClusterIP      10.107.104.161   <none>        443/TCP                      3h50m
ingress-nginx          ingress-nginx-defaultbackend         ClusterIP      10.103.243.207   <none>        80/TCP                       3h50m
kube-system            kube-dns                             ClusterIP      10.96.0.10       <none>        53/UDP,53/TCP,9153/TCP       3h52m
kubernetes-dashboard   dashboard-metrics-scraper            ClusterIP      10.100.132.173   <none>        8000/TCP                     3h49m
kubernetes-dashboard   kubernetes-dashboard                 NodePort       10.97.126.97     <none>        443:31708/TCP                3h49m
You should be able to see that the EXTERNAL-IP is set for the Load Balancer ingress-nginx-controller. In this instance 84.40.62.50.
If you now go back to the infrastructure manager and add a firewall rule to allow port 80, you should be able to view the application in a web browser.
You will also be able to view the details in the dashboard which you can acces from the infrastruture editor after clicking on one of the Instance Arrays (Kubernetes/Dashboard):